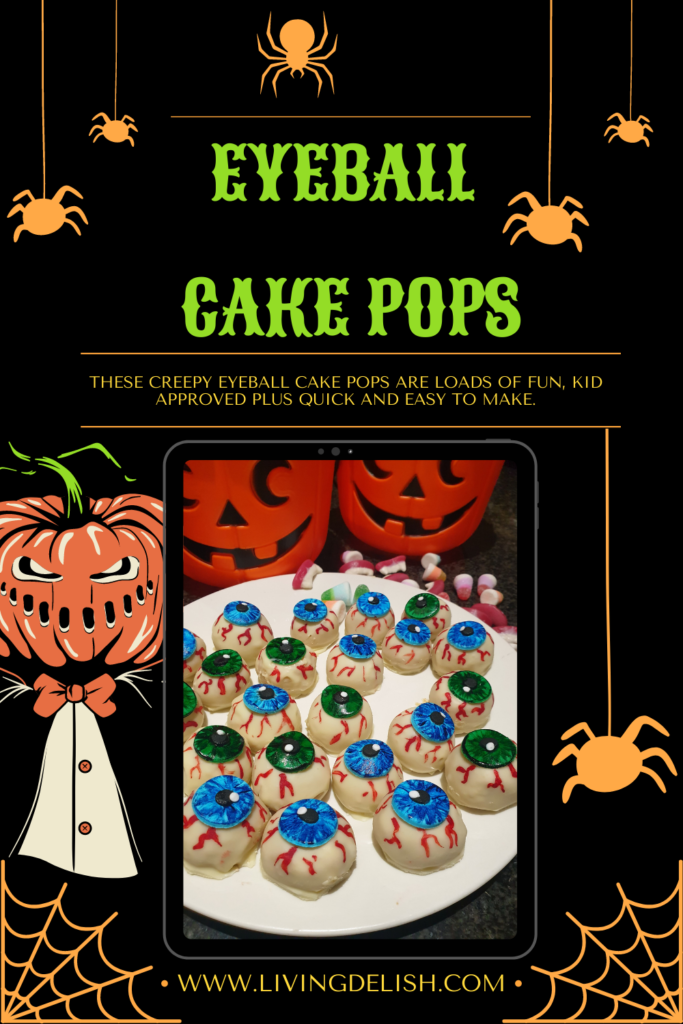
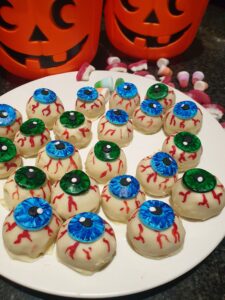
These creepy Eyeball Cake Pops are loads of fun, totally kid-approved, and surprisingly quick to make! And did I mention—super fun to eat?
My kids go wild for silly little treats, especially around Halloween, and these spooky cake pops tick all the right boxes. They look amazing, taste incredible, and you can have them ready in just about an hour and a half.
Ways to make cake pops
There are tons of ways to make cake pops (and even more shapes to try). Traditionally, they’re small round balls—but these days, creativity rules! You can mold them into anything to fit your theme.
There are two main methods:
- Using a mold
- Rolling by hand
For this recipe, I went old-school and rolled them by hand. It’s simple, quick, and honestly kind of therapeutic.
Cake pops are also the perfect way to use up leftover cake or offcuts—no waste, just pure deliciousness.
Eyeball Cake Pops Recipe
This recipe makes around 30 Pops. Depending on the size.
Ingredients
- Ready baked cake. 8-inch, 2 layer cake will do.
- +/- 250 ml Buttercream icing. (Check out this post for some great Icing recipes: 5 Great icing types to try…. TODAY!!! )
- +/- 300g melting chocolate, white
- 5 ml Cooking oil (I used sunflower oil)
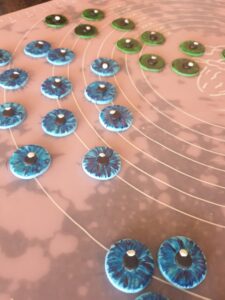
- Assorted Candies or fondant for the eye Iris. (I made mine out of Fondant, and painted detail on them using food coloring. Make these before hand)

Directions
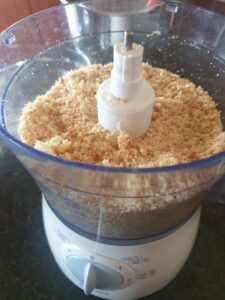
Using a food processor, process the cake until it resembles fine crumbs.
Transfer the crumbs to a mixing bowl, and set aside.
Now make the buttercream icing. Feel free to use store bought, ready to use Icing. This will even save more time. 😊 You will need +/- 250 ml Icing. But adjust as needed.
Add half of the icing to the cake crumbs. Mix together, slowly add a bit more icing until a stiff, but moist mixture is obtained.
Be careful not to add to much icing. If the mixture is too moist and soft it will not keep its shape.
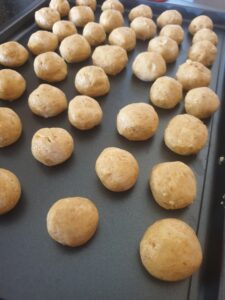
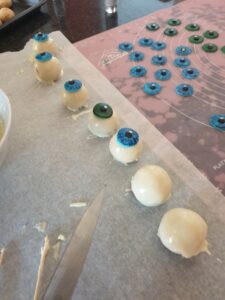
Line a baking tray with some baking paper. Start to roll little balls. I rolled mine between 3 – 4 cm in diameter. Make sure they are nice and round.
Place the rolled balls on the prepared baking tray.
Once done, place the tray in your freezer for +/- 20-30 minutes. Feel free to leave them in longer. Leave them in the freezer while you start to prepare the melted chocolate.
Covering the Cake balls and decorating
Finley chop the chocolate and place in a microwave safe bowl. Microwave until melted, making sure to stir every 30 seconds or so. Now add the cooking oil and mix with a spoon until combined. This will make the chocolate a bit more runnier.
Remove the cake pops from the freezer. Place, one at a time into the melted chocolate. Use a spoon to help you coat the whole ball then use a fork to lift it out of the melted chocolate. Allow the excess chocolate to drip off. Carefully place the coated ball back on the lined baking tray.
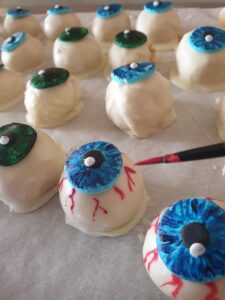
While the chocolate is still soft, add the Iris details. When done, place the balls back into the fridge, until set.
Allow to harden. Mix together a little bit of red Luster dust with a small amount of vodka. This should not be too runny. Use this to paint the veins onto the cape pops. You can also use a food safe pen, and draw the veins on.
Store in airtight container in the fridge.
Enjoy!
Looking for some Halloween Treats?