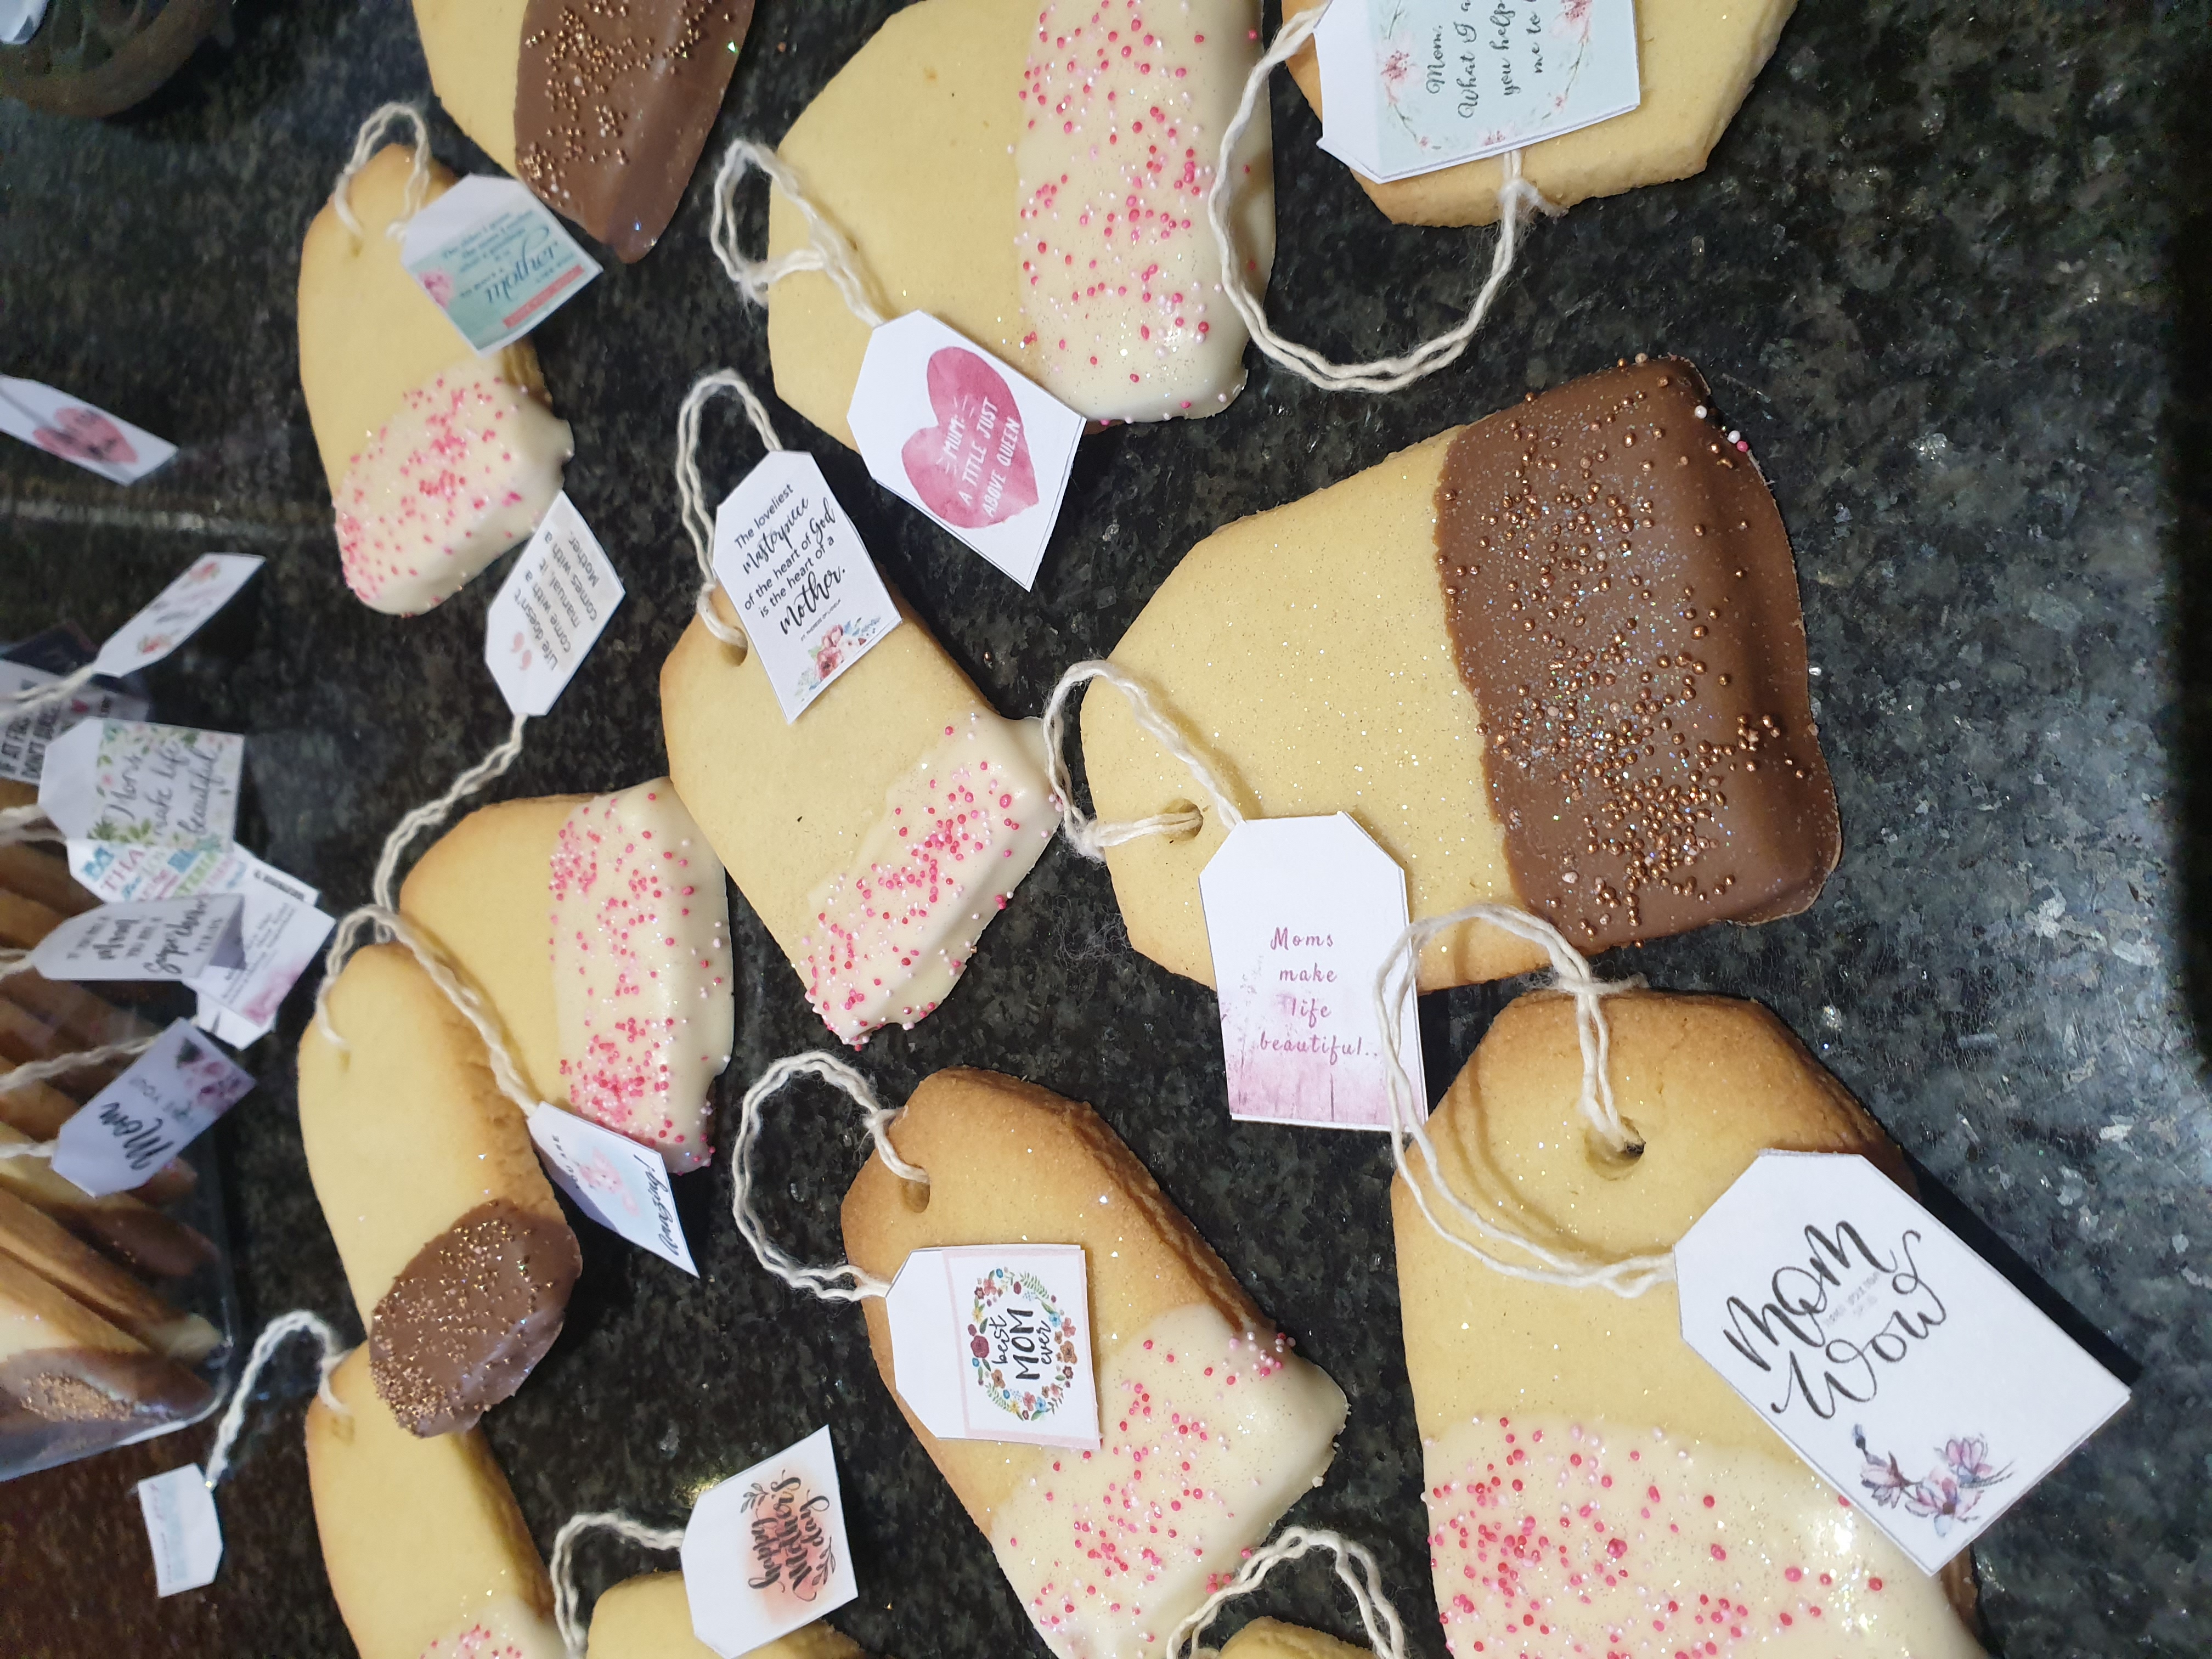
Why not treat mom to something special this mother’s day. These Teabag cookies for mom will make her heart melt and they taste amazing!
Giving something homemade has so much more meaning. I know I love getting homemade goodies form my kids on Mother’s day or anytime for that matter. I’m a very sentimental person, and this really makes me feel super special and appreciated. It is the time and effort that they put into a gift that is just so sweet. 🥰
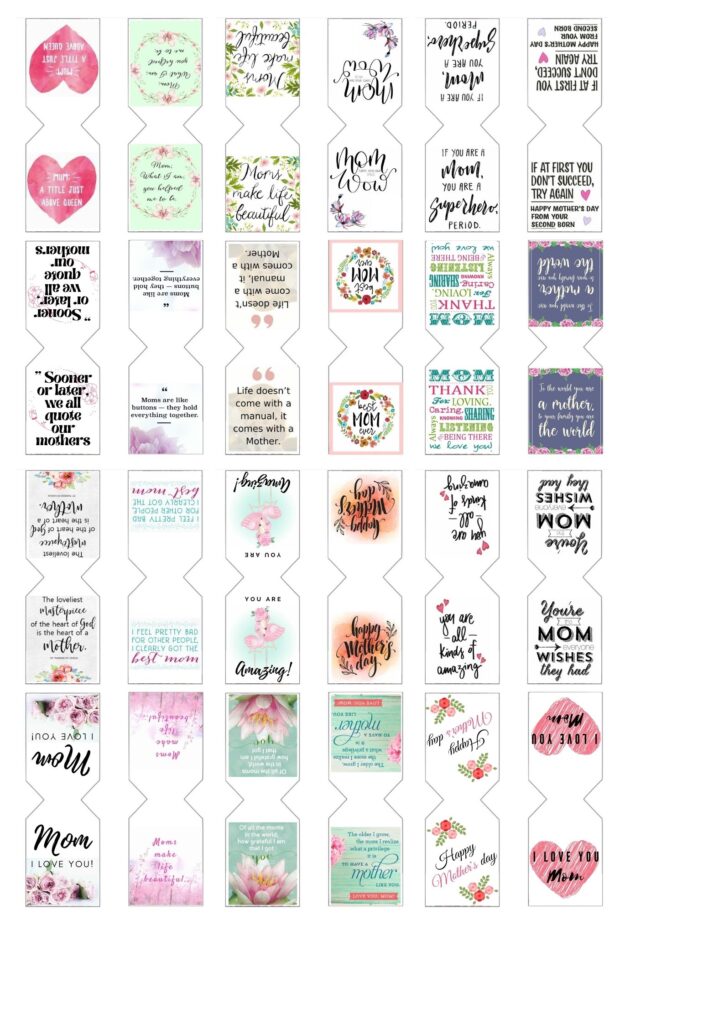
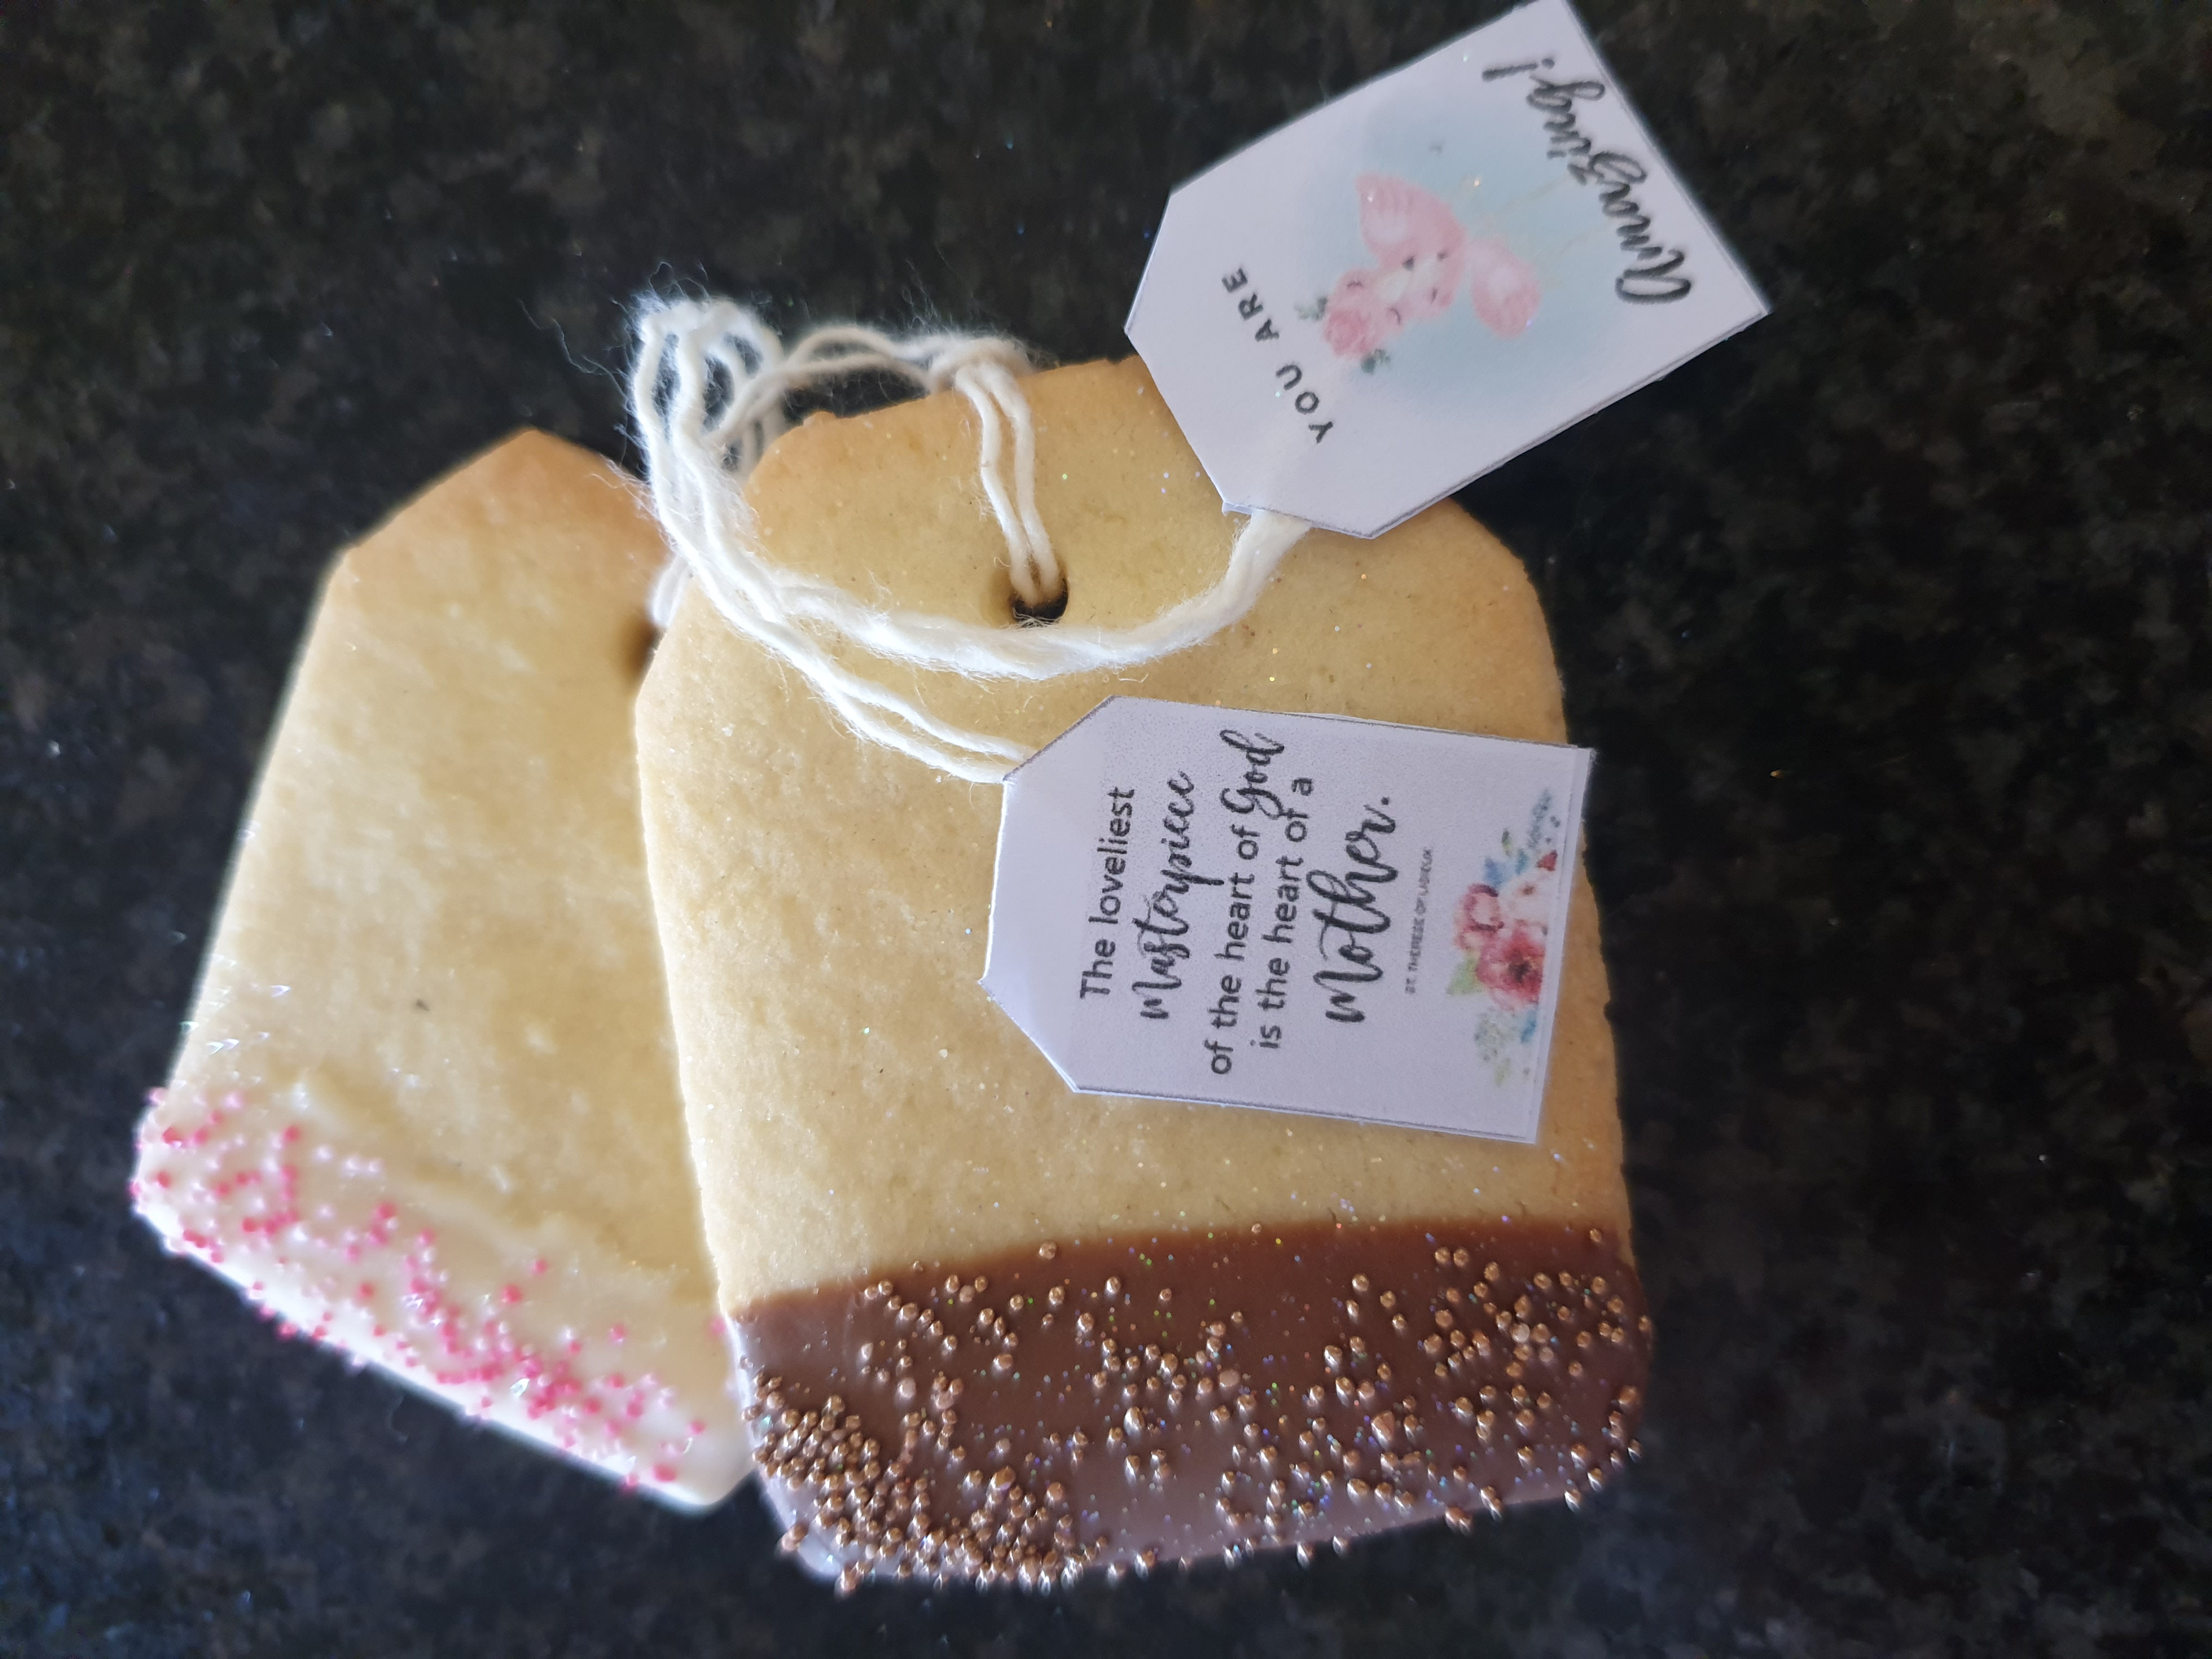
These cookies are very special and each cookie has its own unique message, making mom feel loved with every cookie that she enjoys!
The below tags are downloadable and printable.
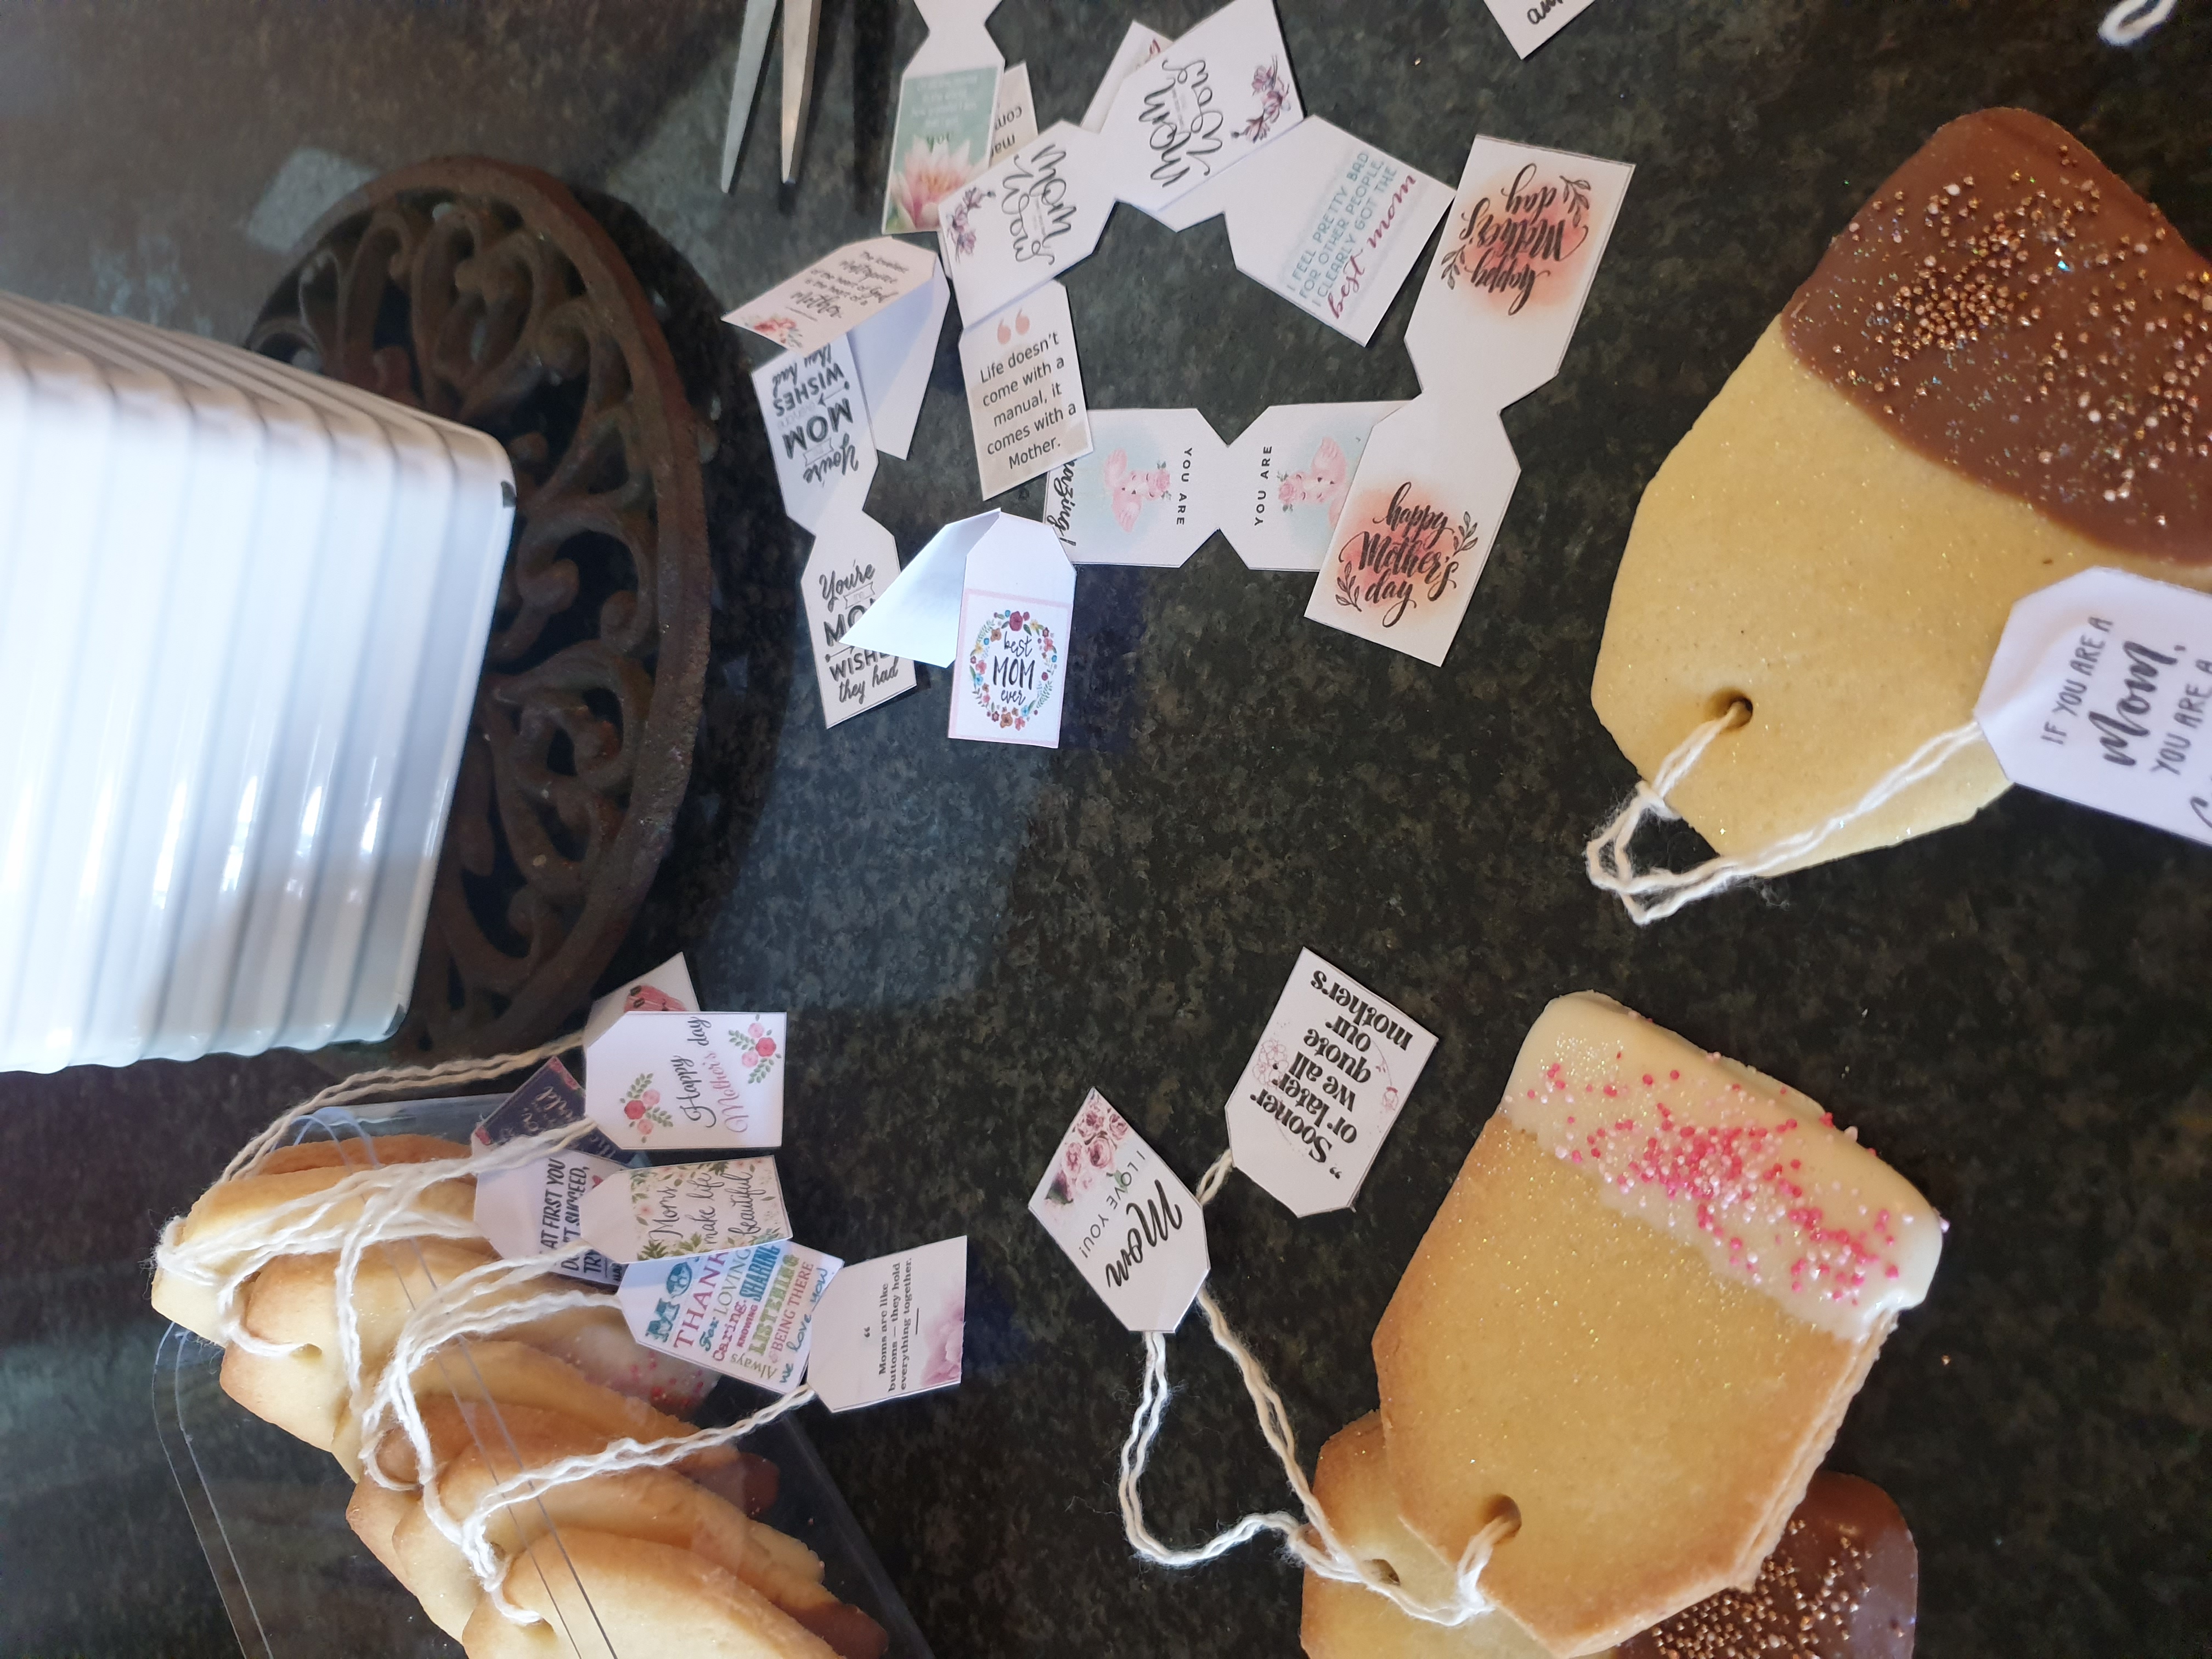
Simply print and cut out. Use some string and tie it thru the hole in the cookie and glue the loose ends of the string to the inside of the tag. And done!! As simple as that!
You will need for teabag Cookies for mom:
1 x Mother’s day teabag tags, printed and cut out
Thin white string
Glue stick
1 x Batch baked cookies as mentioned below.
Instructions:
Bake and complete all the steps for the cookies as mentioned in the below recipe.
Download, print and cut out the teabag tags.
Use some string and tie it thru the hole in the cookie and glue the loose ends of the string to the inside of the tag. Press the tag together pinching the sting between the two pieces.
Set aside to dry. Continue until all the cookies are done.
Teabag cookies for mom
Makes +/- 36 cookies
Ingredients
85g Butter, soften
140g White Caster sugar
1 Egg
1 teaspoon vanilla essence
210g Cake flour (And a little bit more for rolling the dough)
150g Chocolate (For dipping)
Directions
In the bowl of your stand mixer, beat together the butter and sugar until light and fluffy.
Now add the egg and vanilla essence and beat well until the egg is completely incorporated.
Add the flour and mix until a soft dough is formed. Remember to stop the mixer every so often to scape down the sides of bowl. If the dough is to soft, add a little bit of flour to stiffen up the dough. Be careful not to add to much. The dough should be soft, but shapeable.
Take the dough out of the bowl and shape into a rectangle. Cover the dough with cling wrap and allow the dough to rest for an half an hour in the fridge.
Heat the oven to 180 ˚C and grease two cookie trays and set them aside.
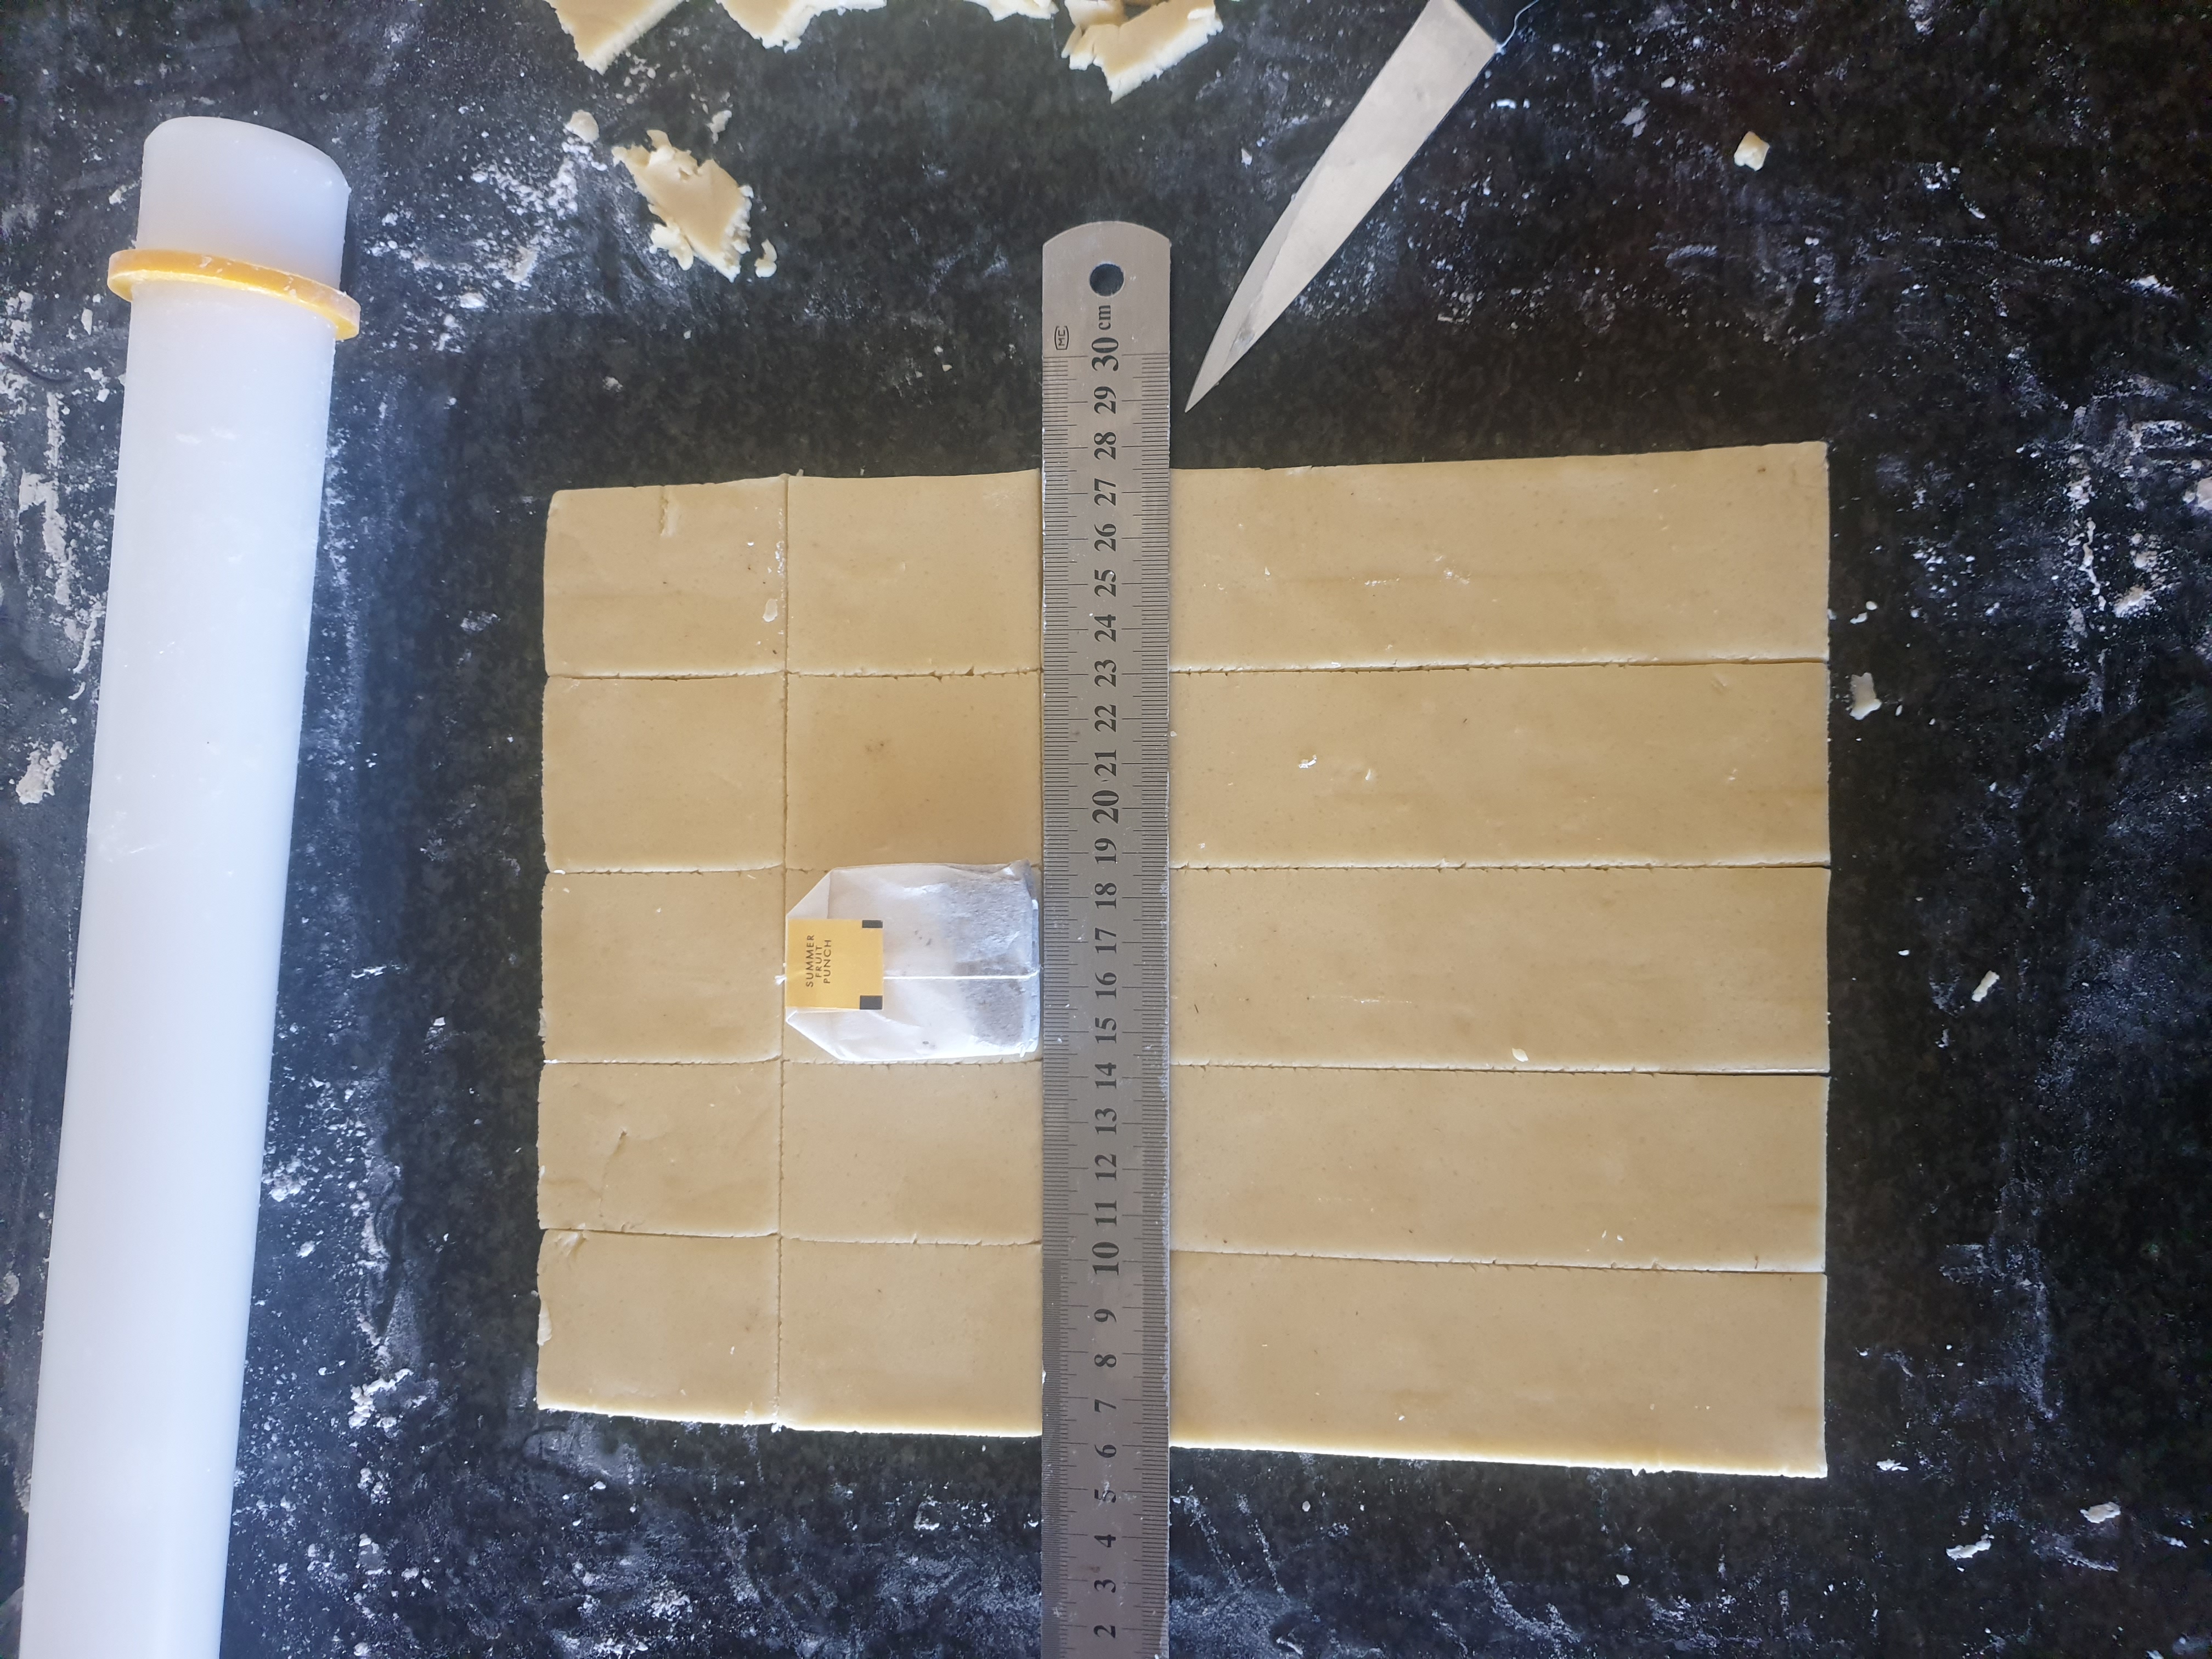
Lightly flour your working surface and roll the dough out to around 1cm thickness. I used a teabag to give me some guidance for the size cookies that I would like to make. Using a ruler measure out exact straight lines and cut the dough with a sharp knife. Cut to top corners of each tea bag at a 45 degrees angle, to form a tea bag.
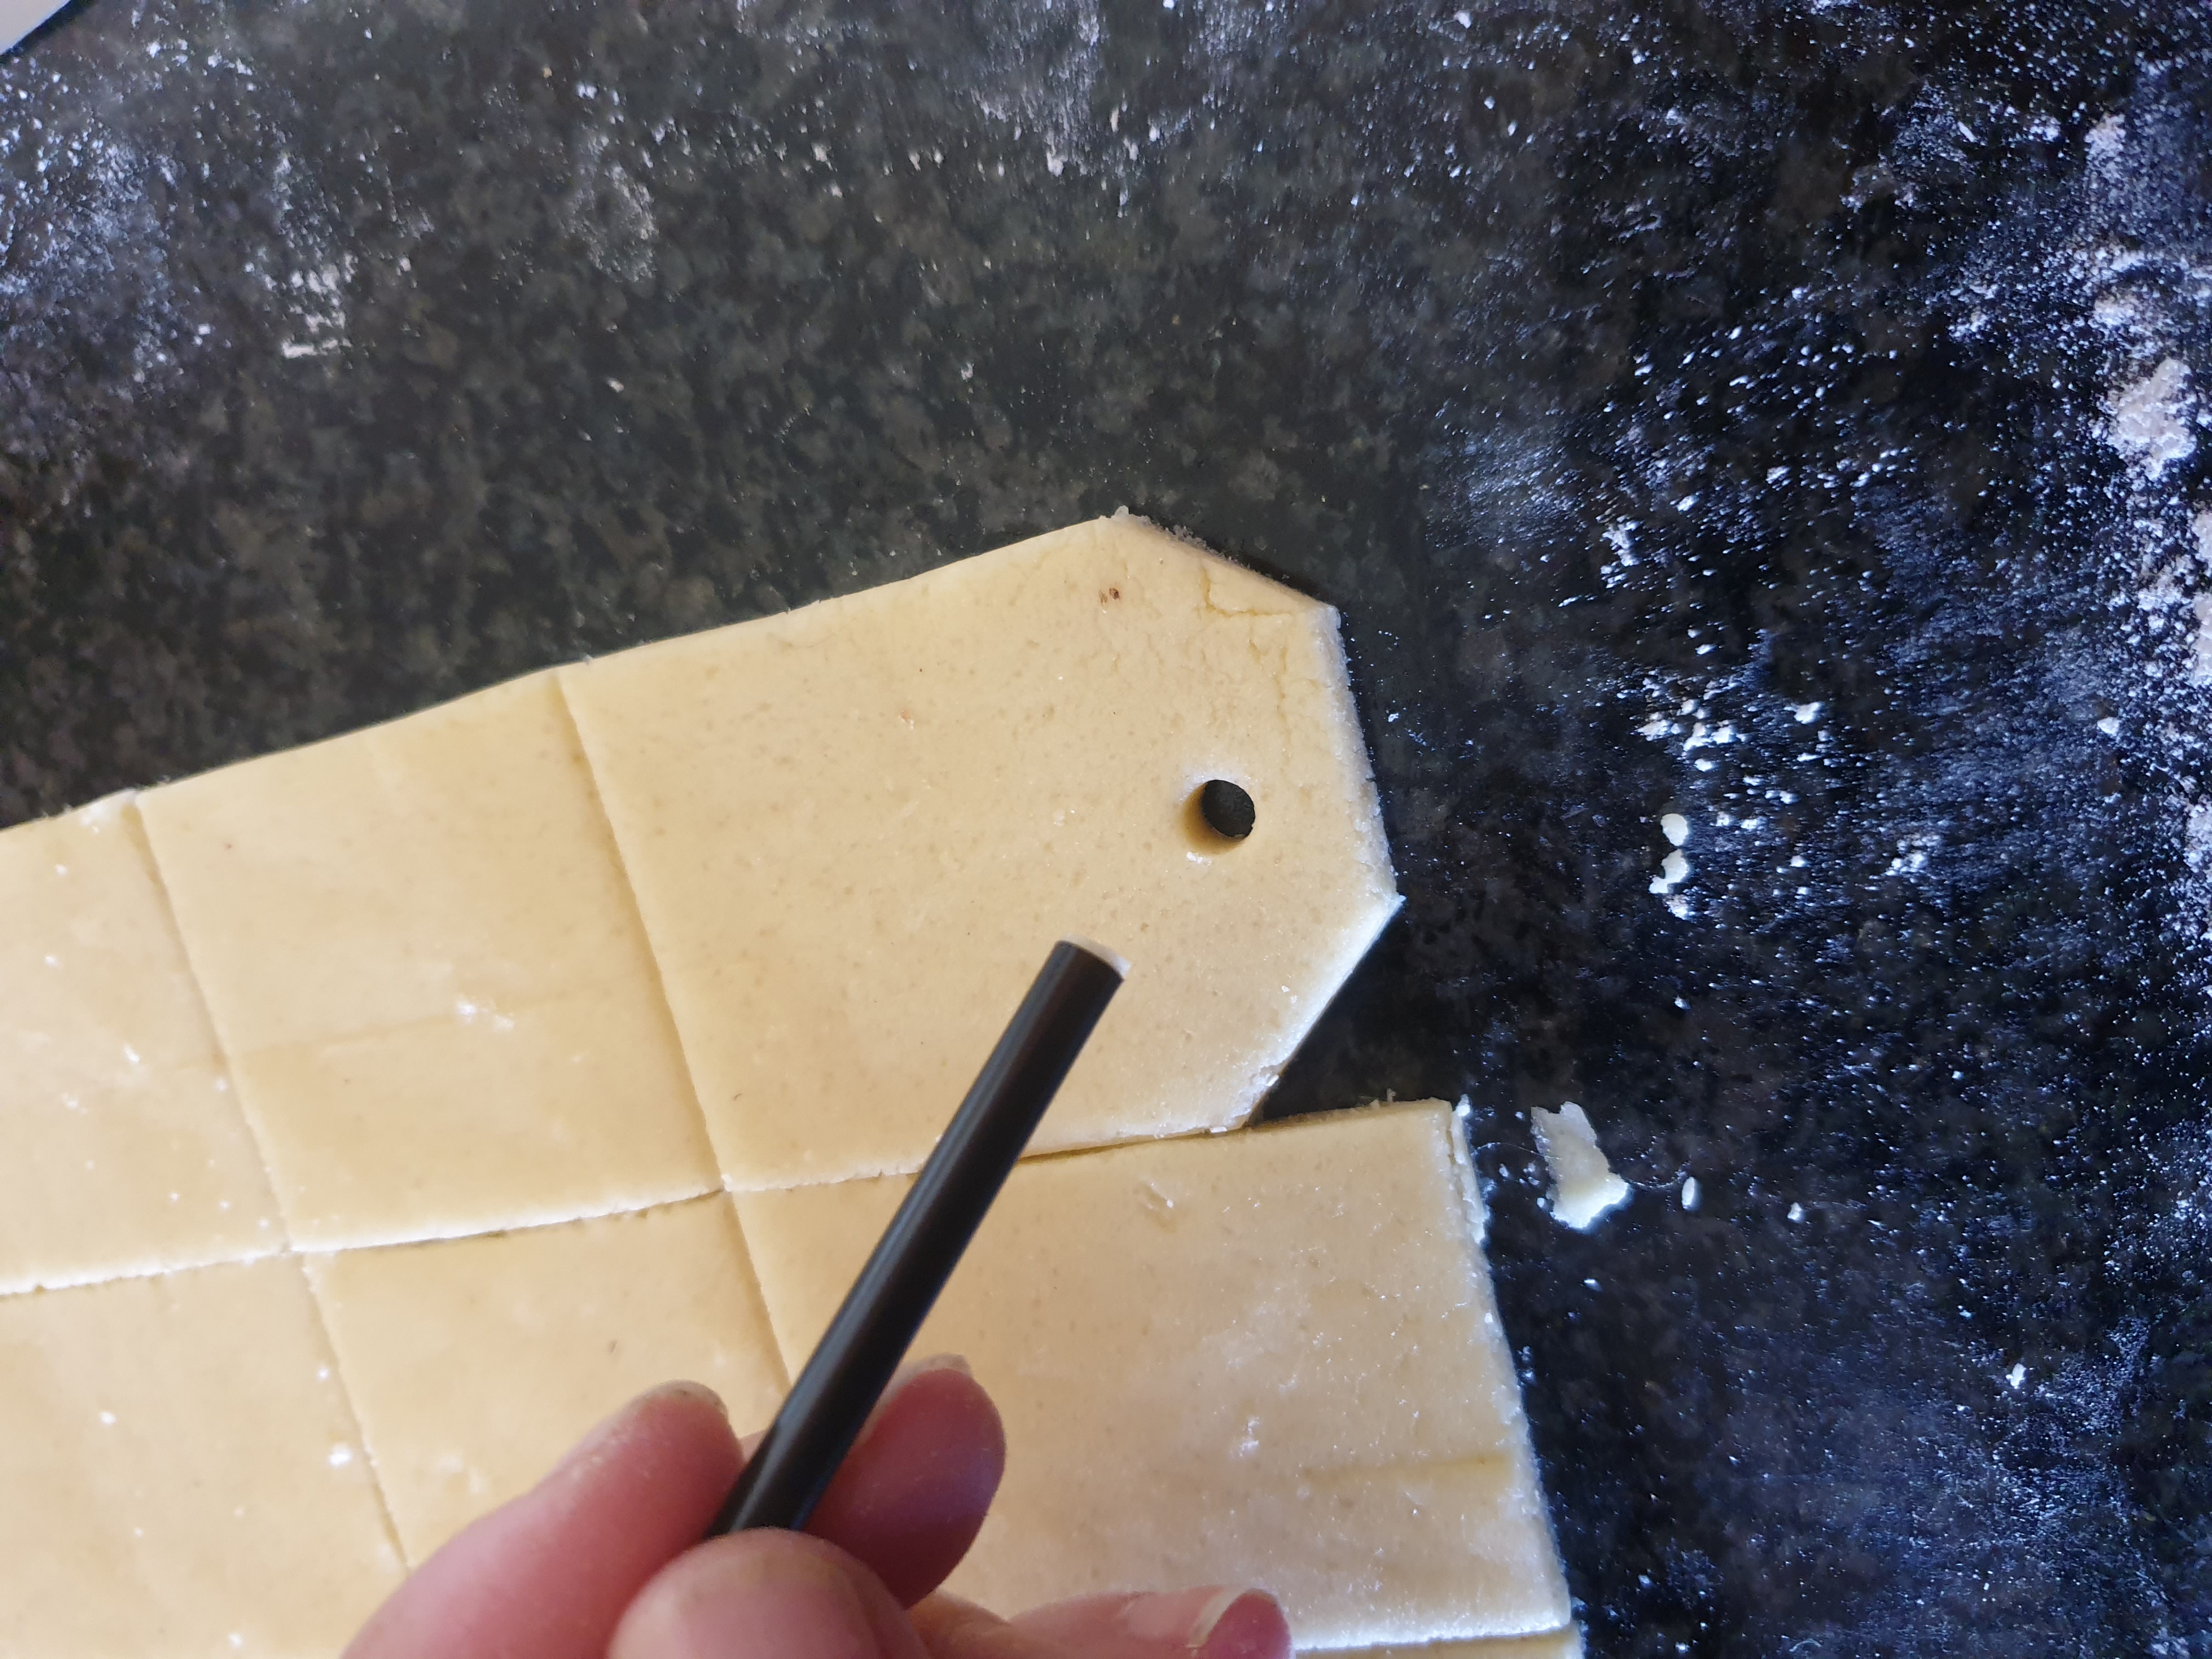
Use a straw and carefully cut out a circle where you would later tie your string.
Carefully transfer to the prepared cookie sheet. Continue until the pan is full. Remember to leave enough space between the cookies for spreading during baking.
Bake the cookies for 8-10 minutes or until light golden brown. Allow the cookies to cool in the pan for a few minutes before transferring them to a cooling rack.
Time for decorating
Start melting the chocolate, once the cookies are completely cooled. I use a microwave to melt the chocolate. To do this, chop the chocolate fine and add to a microwave safe bowl. Microwave short burst of 10 seconds, stopping and stirring after each 10 seconds. Continue until the chocolate is completely melted. By doing this you are ensuring that the chocolate doesn’t over heat and burn.
Dip the ends of the cookies in the melted chocolate and place on wax paper. Decorate with sprinkles, and allow the chocolate to dry completely before handling the cookies. Once they are dry start to add the string and tag as mentioned in the instructions.
Store in an airtight container.
Hungry for more?